How to Build a ChatGPT for Your Business: Step-by-Step Guide
Looking to create a powerful, custom chatbot for your business? Follow this guide to set up your own chatbot GPT using sitebot—without any coding! sitebot leverages advanced GPT models to train your chatbot, offering an intelligent and dynamic solution tailored to your specific needs.
Start with a Free 14-day sitebot Trial
Begin by signing up for a free 14-day sitebot trial. Once your account is activated, you can easily build your chatbot GPT. Sitebot's AI, powered by GPT models, automatically trains your chatbot based on your website and other resources, ensuring a highly customized experience. You can add:
- Website URLs
- Documents from your knowledge base
Step 1: Create Your Chatbot GPT Using Your Website
-
Set Up Your Chatbot
- Navigate to the sitebot app's home page and select + New Chatbot.
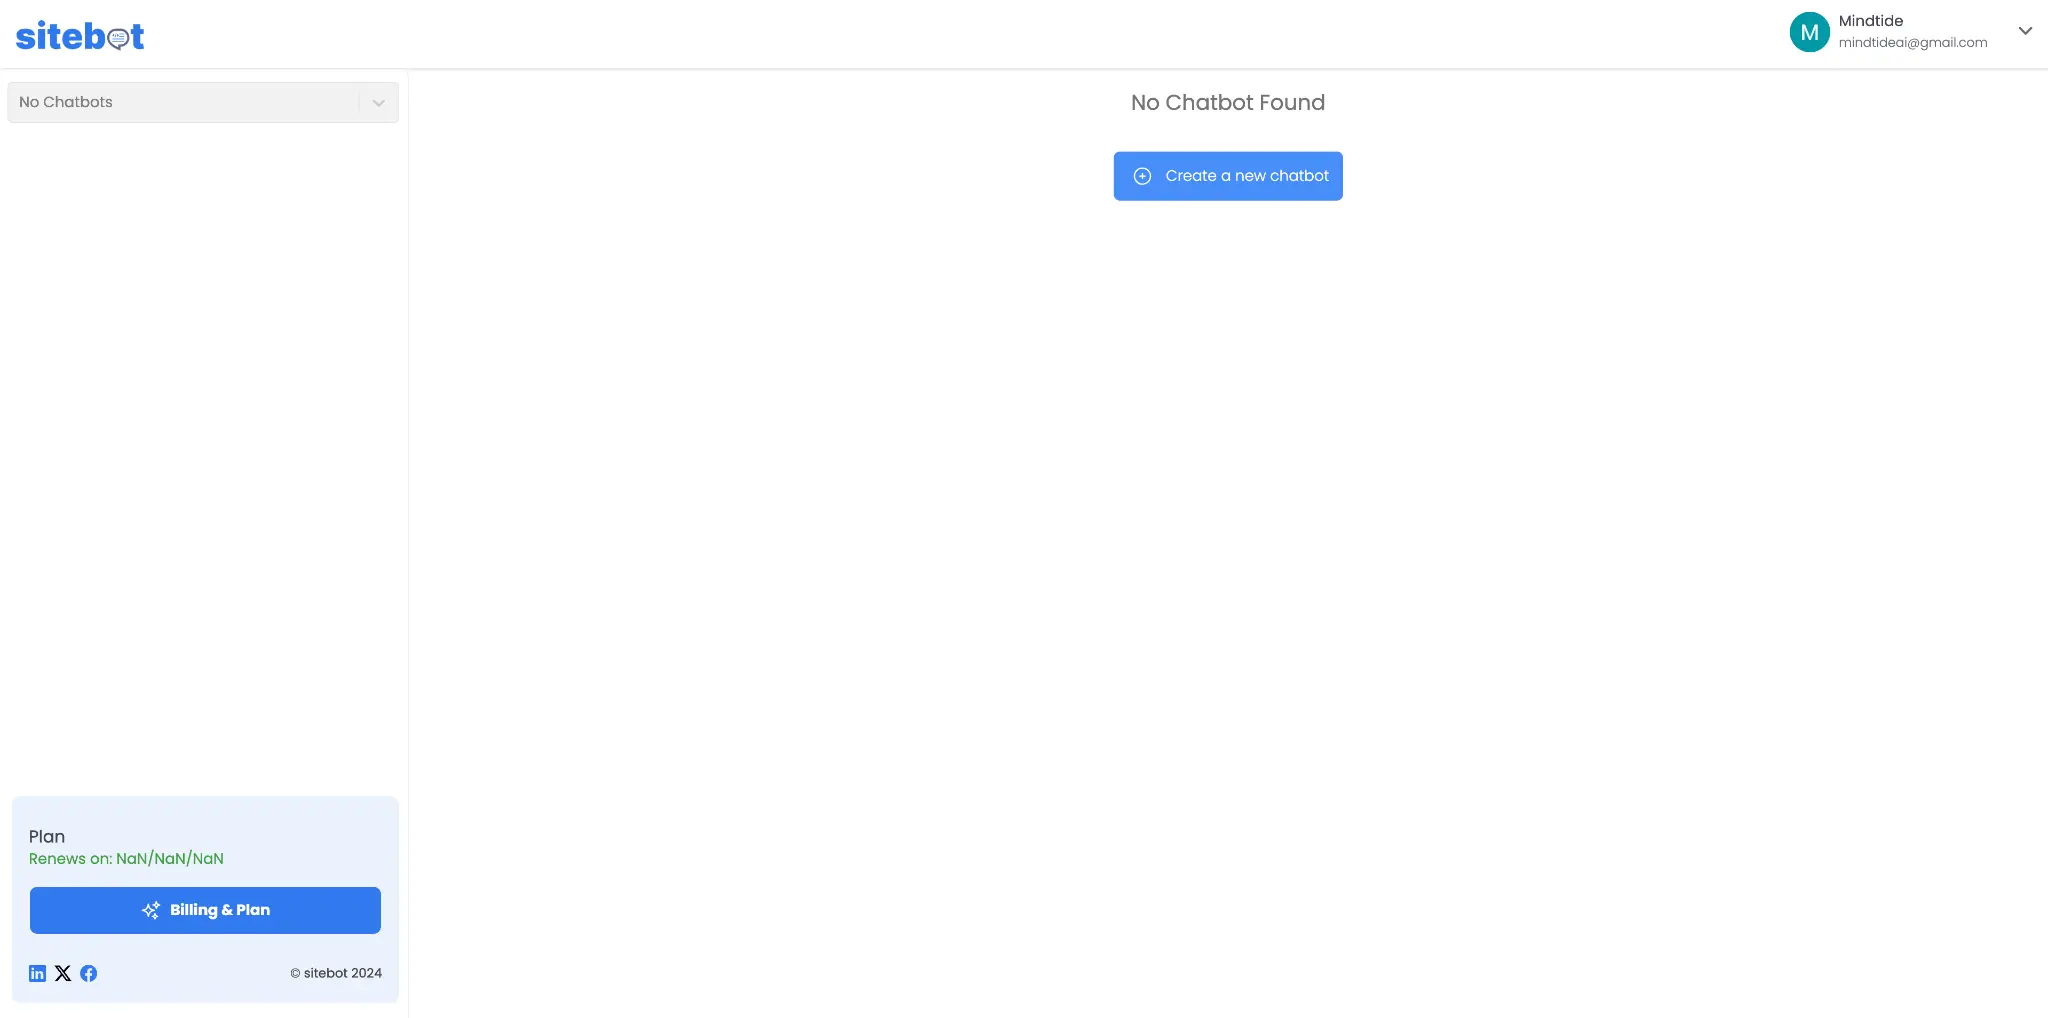
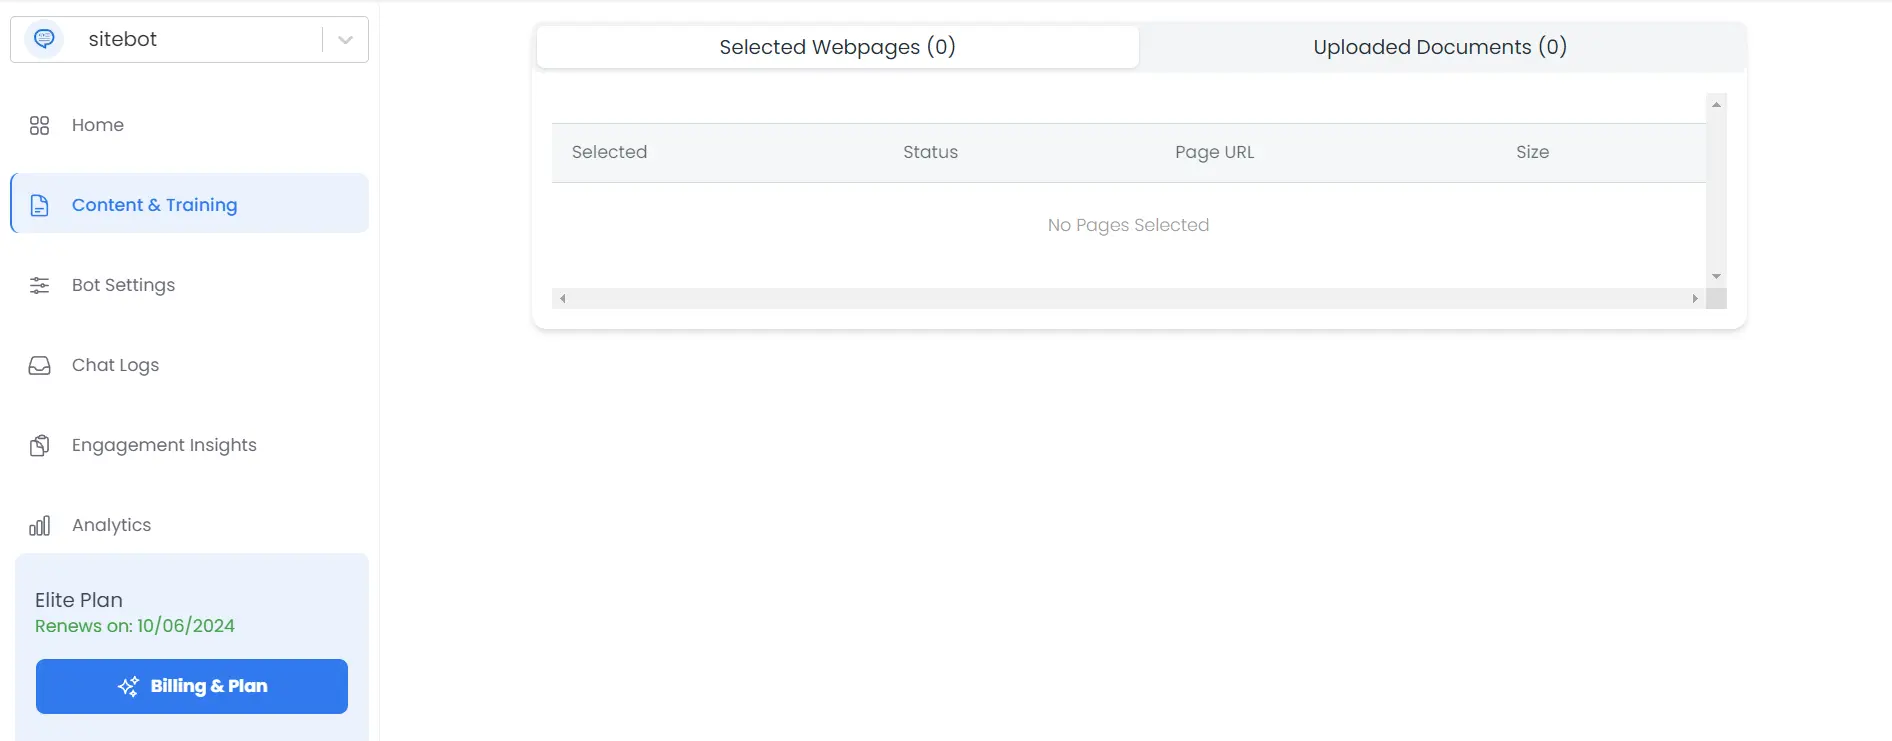
- On the "Provide content for your chatbot" page select the webpages tab at the top (selected by default). You can also click on the "Documents" tab to add documents from your knowledge base.
- Navigate to the sitebot app's home page and select + New Chatbot.
-
Provide Content for your Chatbot GPT
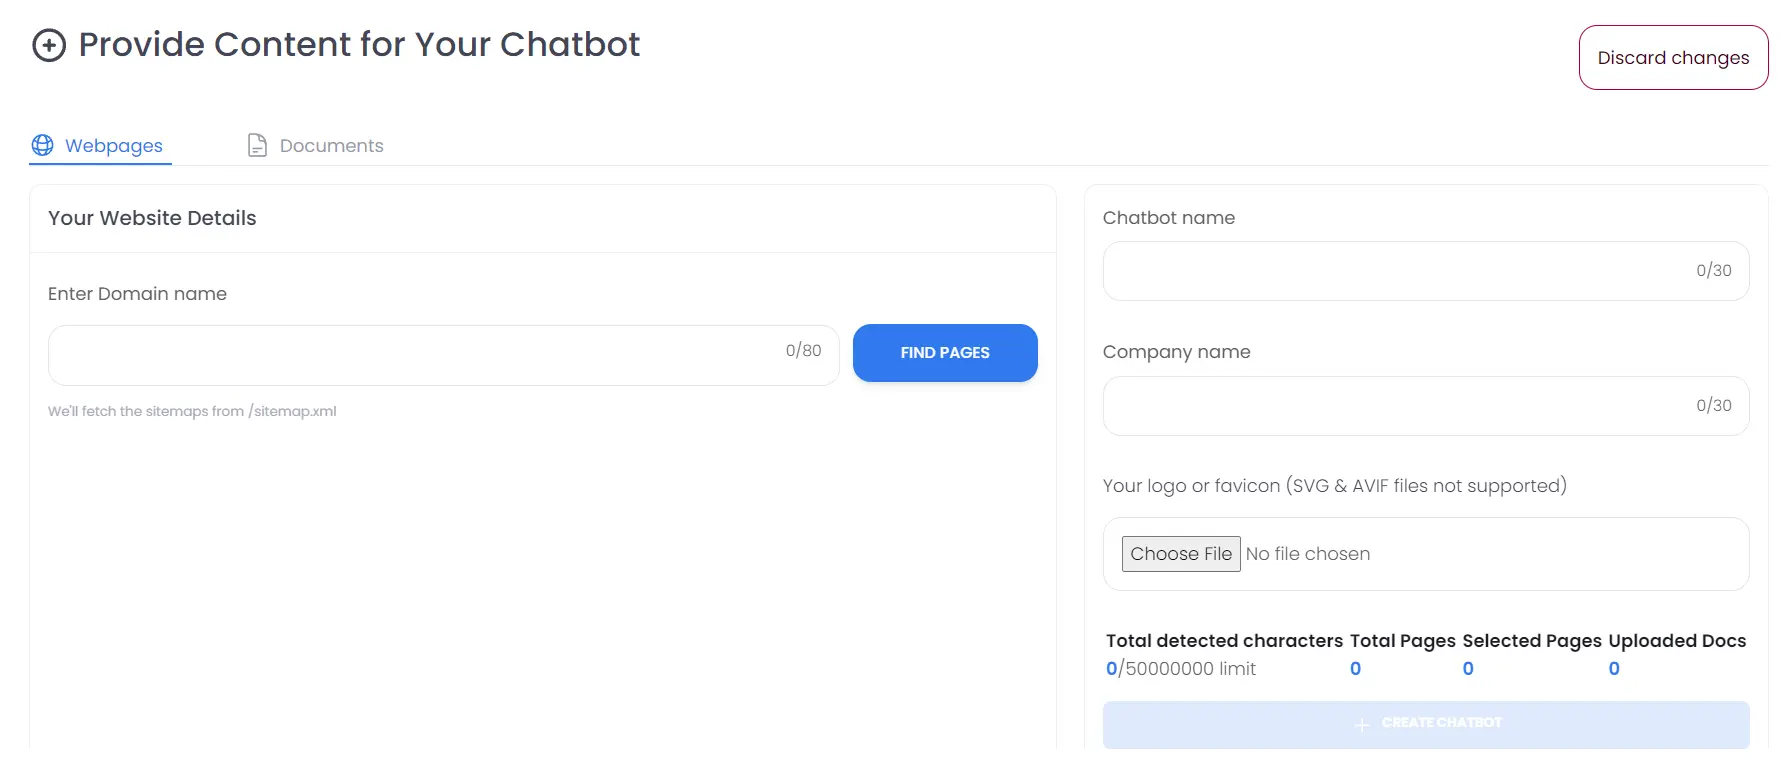
- Enter your domain name and click Find Pages.
- If there are any issues scanning your site, refer to our FAQ or reach out to us at [email protected].
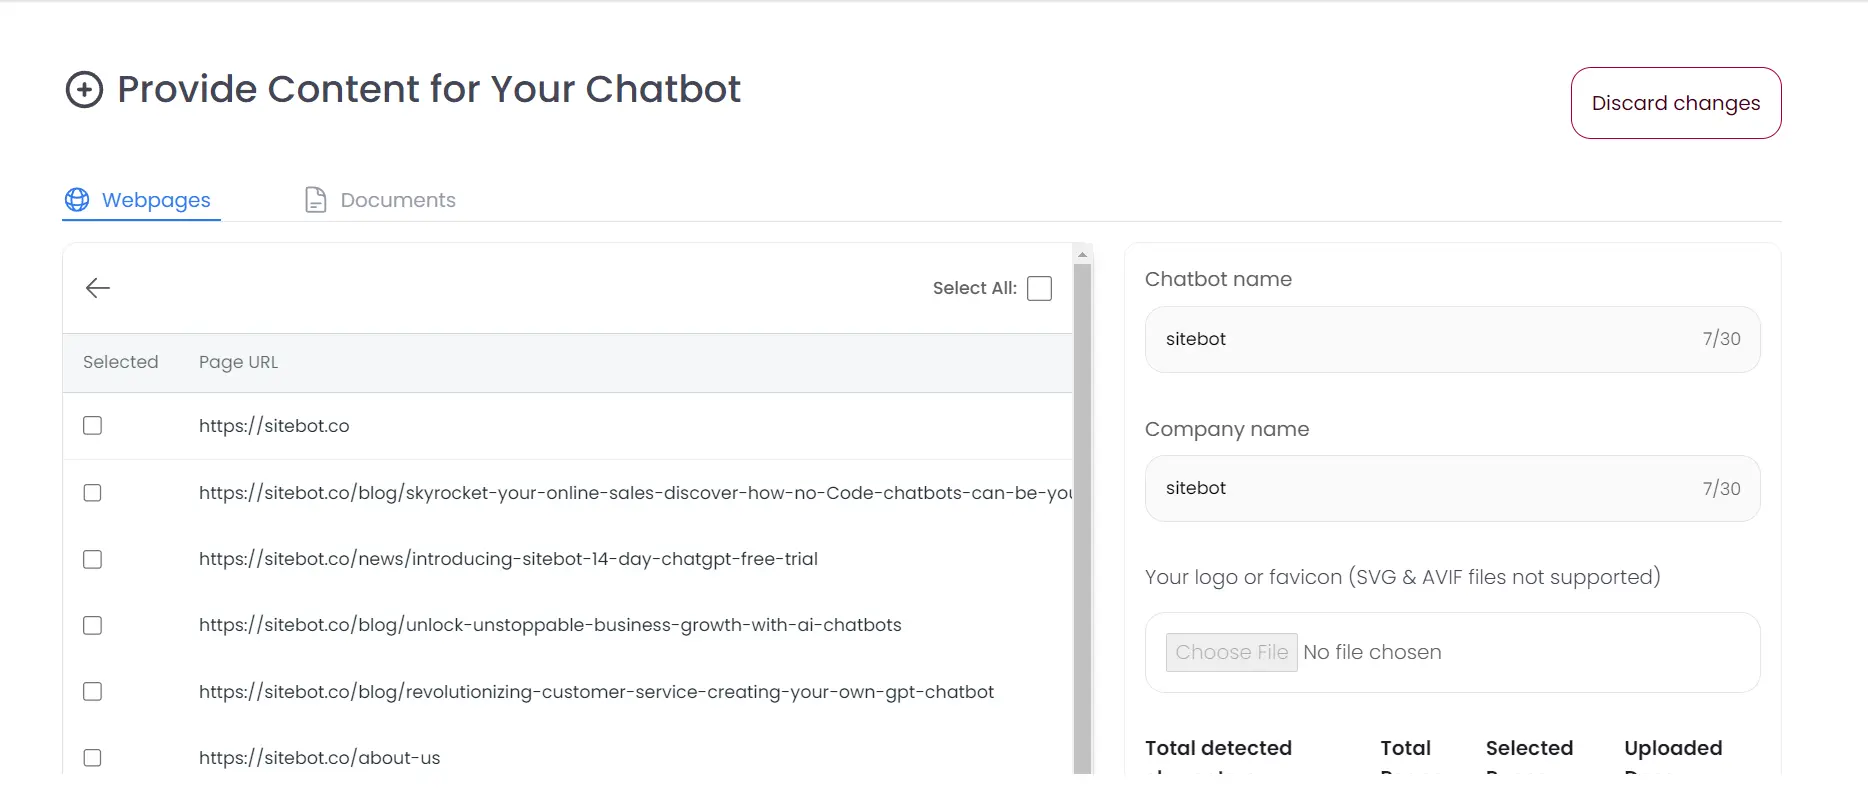
- Once your website is scanned, click on Select Pages for Training, you'll be able to see all the pages sitebot discovered from your sitemap, at this point, you can select or deselect specific pages for training.
- You'll be able to update the chatbot name, company name and the logo later on in settings.
-
Train Your Chatbot GPT
- When you're ready, click + Create Chatbot to start the training and creation process for your chatbot GPT.
- After the process is complete, you'll be redirected to the home page of your newly created chatbot.
- When you're ready, click + Create Chatbot to start the training and creation process for your chatbot GPT.
Step 2: Tune Your Chatbot GPT
With your chatbot GPT now trained, it's time to fine-tune it:
-
Review and Edit Attributes: During scanning, attributes such as chatbot name, company name are automatically collected. You can check and edit these details by clicking on Bot Settings in the left navbar and then clicking on the Behavior tab.
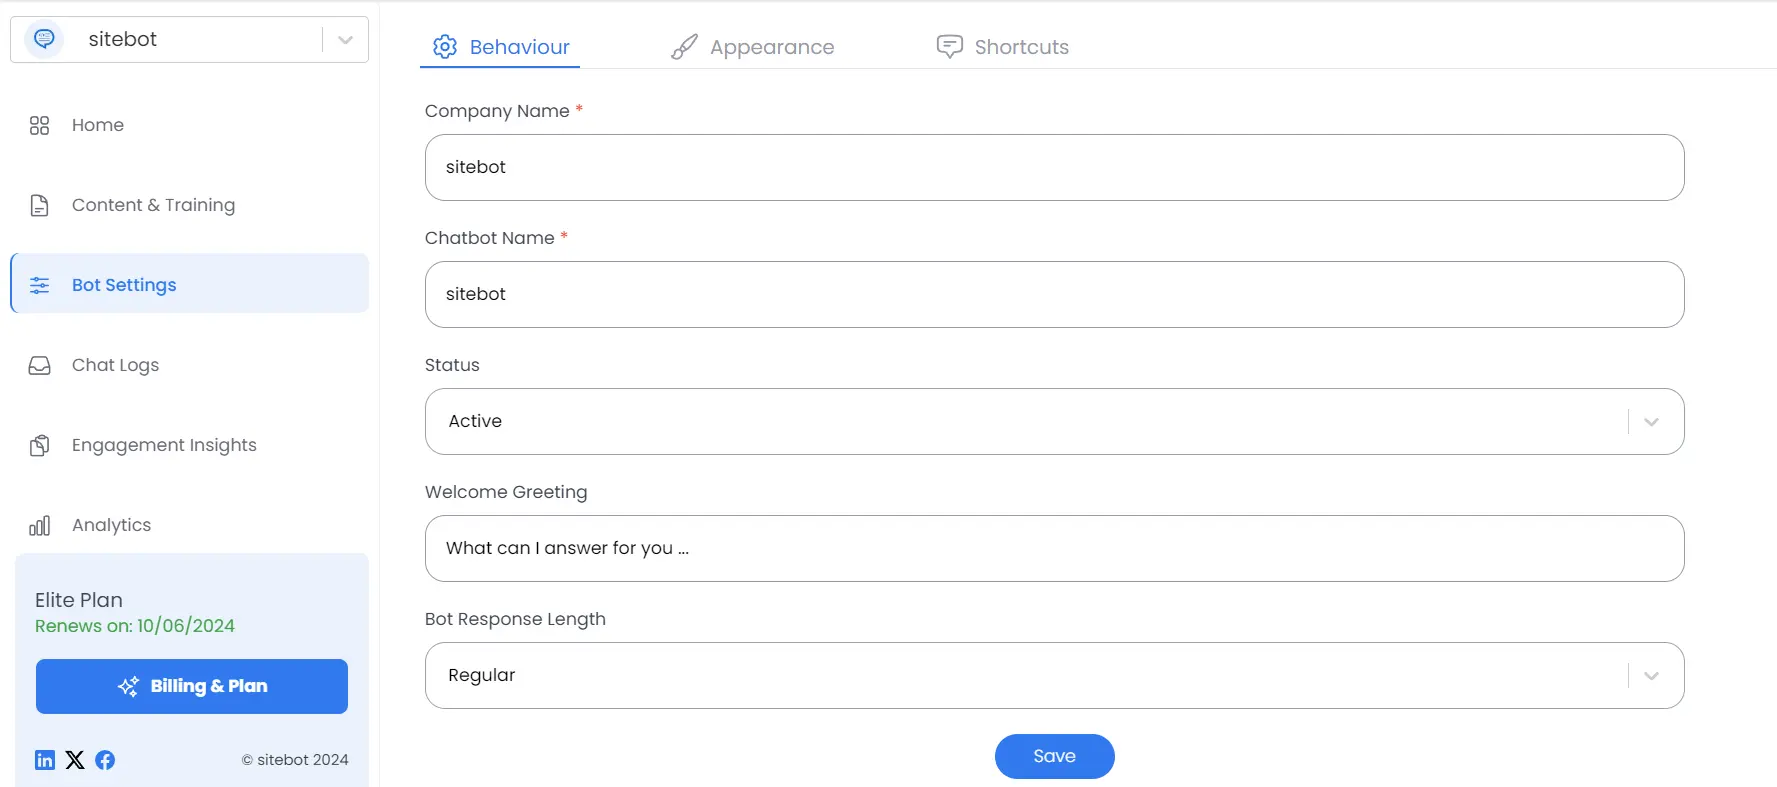
-
Customize the Welcome Greeting: Modify the default greeting to match your brand's tone and personality.
-
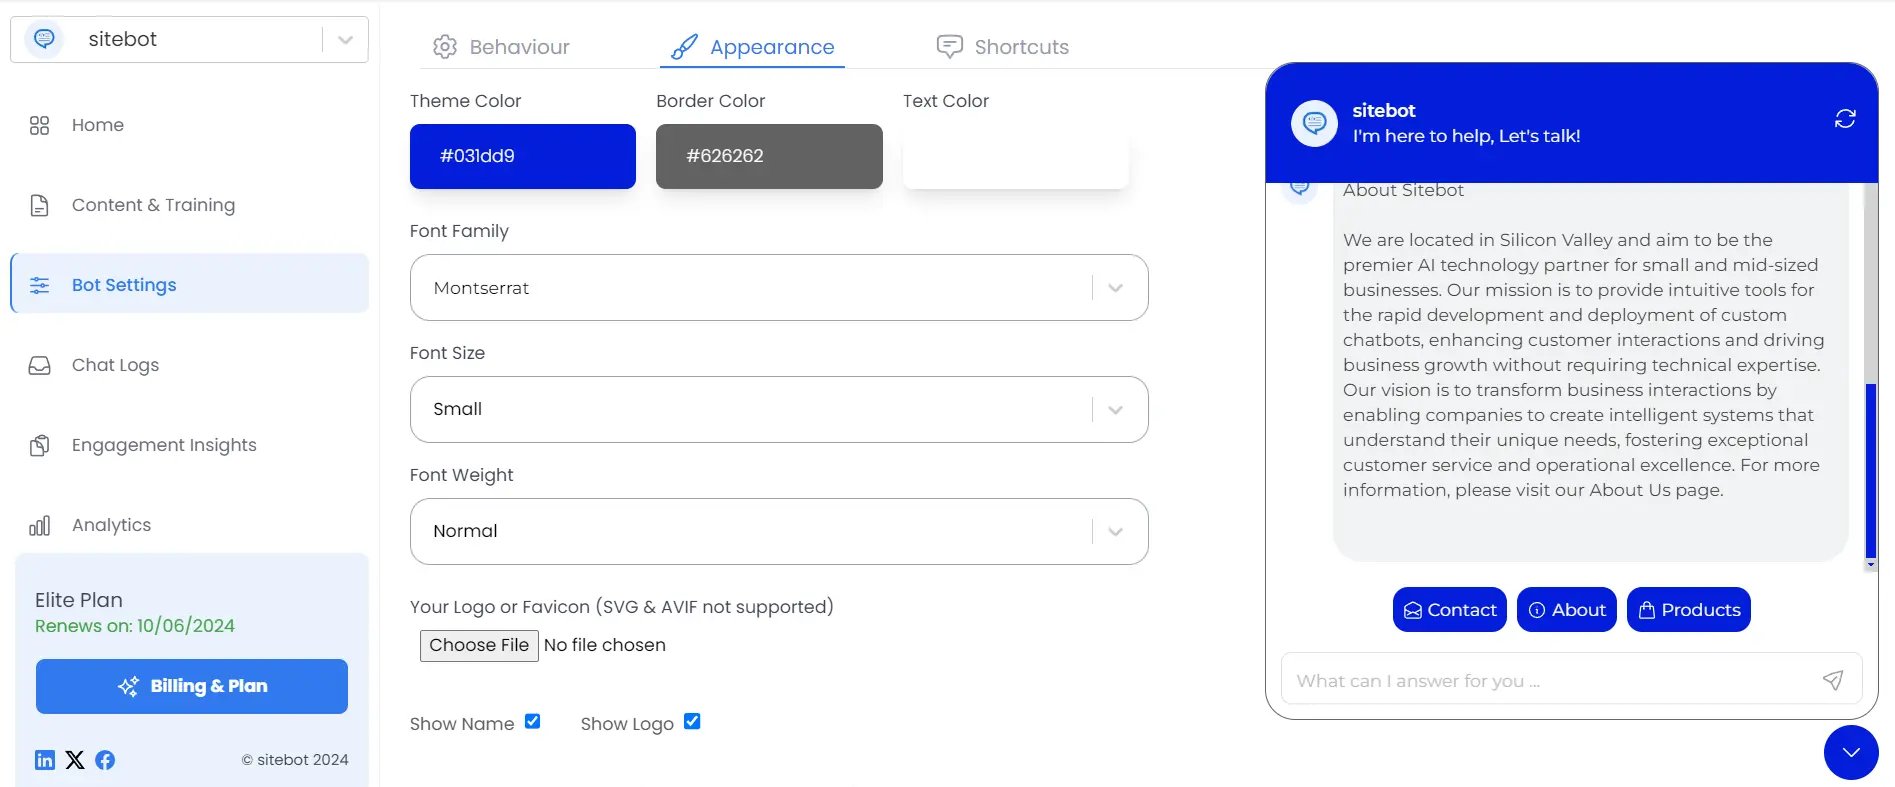
Customize the Look and Feel: Modify the default color scheme by clicking on the Appearance tab and picking the colors to match your brand's tone and personality. You can also upload your logo at this point, the logo will appear in the header section of your chatbot. You can view the changes live while you make them in the preview pane on the right side. You can pick the following:
- Theme Color: Choose your brand color, which will appear prominently in your chatbot.
- Text Color: The text color that will in chatbot conversations
- Font Family, Font Size, Font Weight: Pick appropriate values to match with your brand's theme.
- Logo: You can upload your logo file here. The logo will appear in the header section of your chatbot.
- Show Logo, Show Name: The logo and name will appear in the header of your chatbot if these are checked.
-
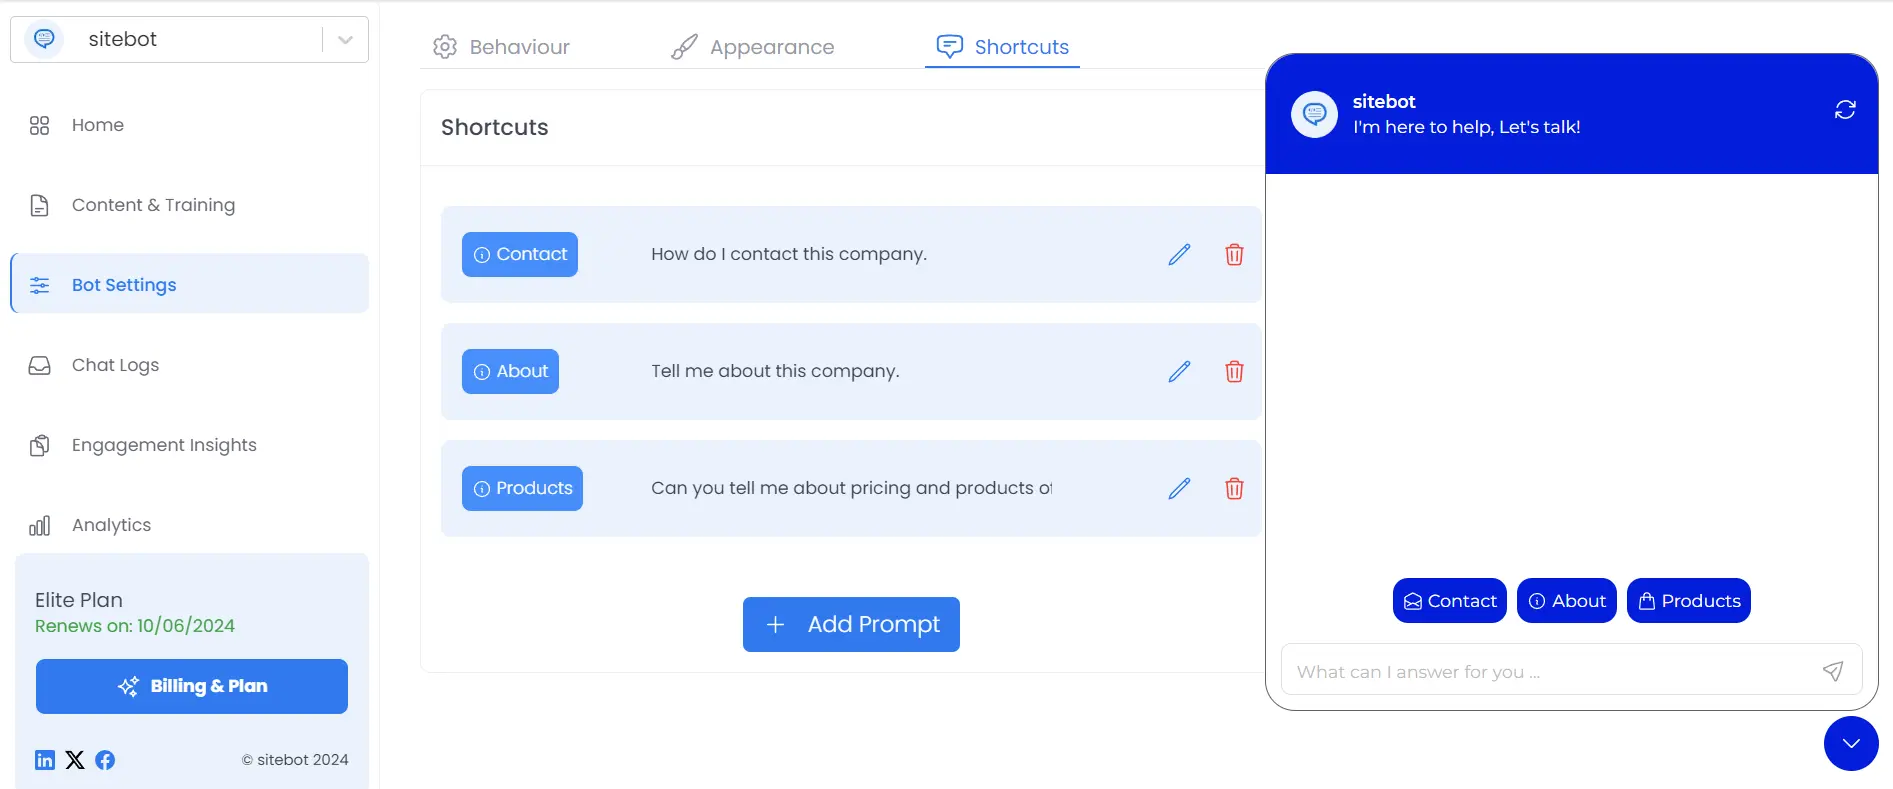
Create Shortcuts for Your Chatbot GPT Enhance your chatbot's functionality by creating shortcuts for frequently asked questions or common actions. These shortcuts can help streamline interactions and improve user experience.
Step 3: Test Drive Your Chatbot GPT
Before launching your chatbot GPT, it's crucial to test it within the sitebot app:
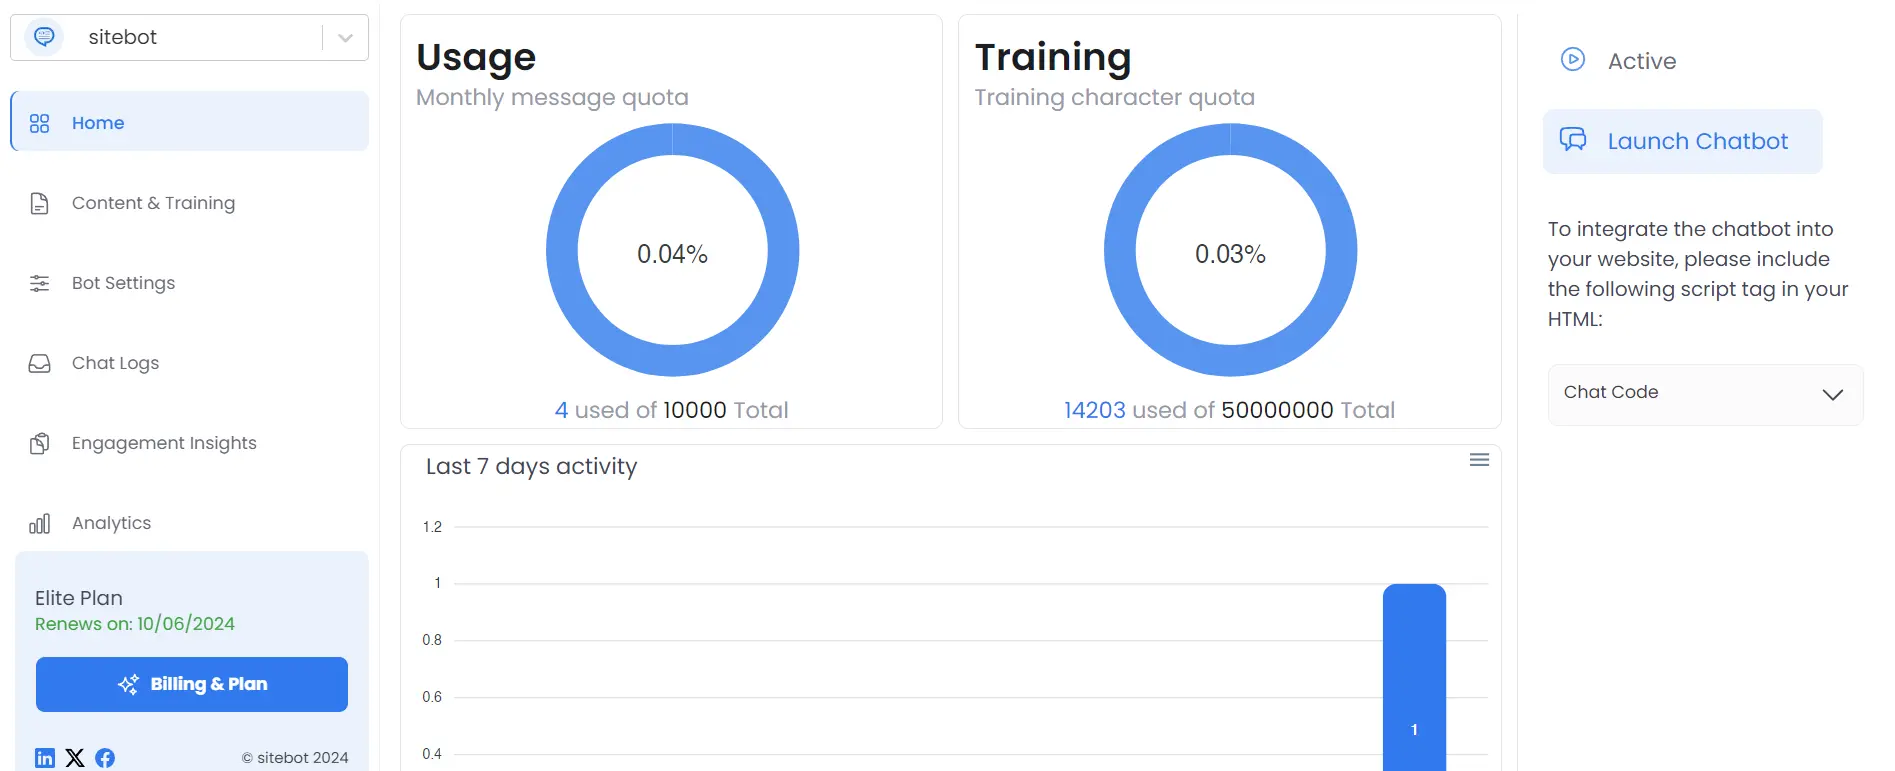
- Go to the Homepage of your AI chatbot.
- Click Launch Chatbot from the right pane and start a conversation to check its functionality.
Step 4: Add More Knowledge Sources
You can improve the accuracy of your chatbot GPT by adding additional knowledge sources such as PDFs, Word documents, articles, and blogs. This ensures that your chatbot provides more detailed and relevant responses. To add more content:
- Click on Content & Training in the left navigation bar.
- Select Modify Content from to add additional documents or webpages.
Step 5: Preview Your Chatbot GPT
Use the real-time preview to see how your chatbot GPT will appear to your users:
- Click Launch Chatbot from the right pane on the home screen.
- Share the preview link with your team or beta testers to gather feedback and ensure a seamless user experience.
Step 6: Install sitebot's Chat Widget on Your Website
To make your chatbot GPT live on your website:
- From the home page of your chatbot, go to the Chat Code link in the right pane and click Copy Code to copy the embeddable widget code.
- Paste the code into your website's source code, just before the closing
</body>tag. - Reload your website. The Chat Widget should now appear in the bottom right corner of the page.

Conclusion: Empower Your Business with Chatbot GPT
By using GPT models, your chatbot GPT becomes a powerful tool that can engage users, provide accurate information, and streamline customer interactions. With sitebot, creating a chatbot GPT is simple, and you can continue to refine and enhance its capabilities as your business grows. Whether you're adding new knowledge sources or tweaking its design, your chatbot will always be ready to deliver a tailored experience for your users.
Start building your custom chatbot GPT today and watch your business communications transform!


